The Basics of Hoodie Structure
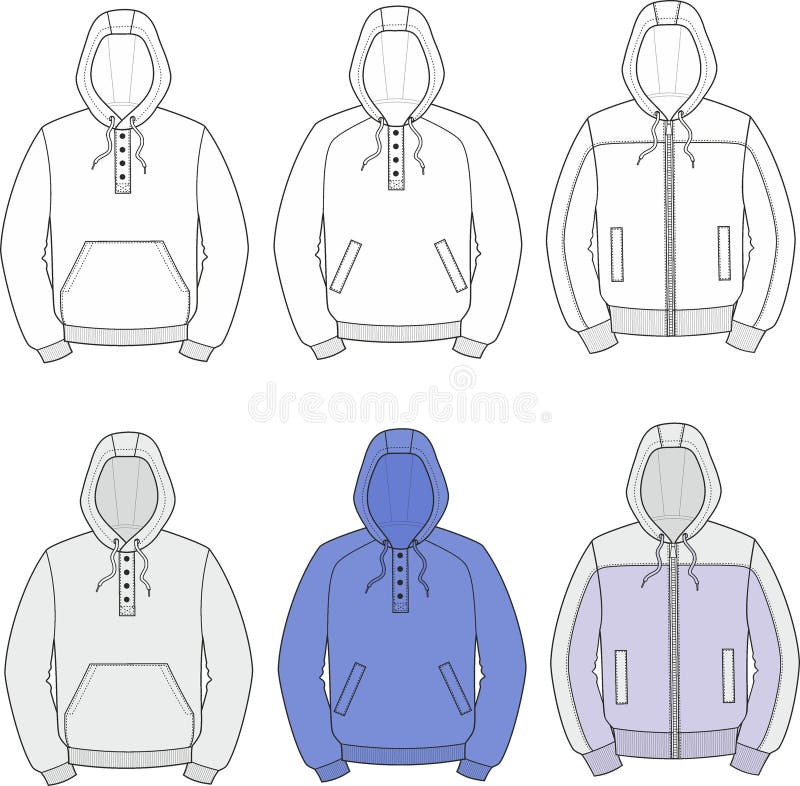
Before diving into the art of drawing hoodies, it’s crucial to understand their basic structure. This knowledge will serve as a foundation for creating realistic and dynamic hoodie illustrations. A typical hoodie has several key components that you should familiarize yourself with:
- The Hood: This is the defining feature of a hoodie. Observing its shape and how it drapes around the head and neck is important. Remember that the hood can change shape depending on whether it’s up or down.
- The Body: The body of the hoodie is the core that provides structure. It’s usually loose-fitting, so take note of how it hangs on the wearer’s body.
- The Sleeves: Hoodies often have long sleeves that can have different styles, such as cuffed or loose. Attention to the length and width is key here.
- The Cuffs and Hem: These elements give a hoodie its completed look. Elastic cuffs and hems can create gathers in the fabric, adding to the realistic portrayal.
- The Pocket: Many hoodies feature a front pouch pocket, which adds to the challenge of drawing hoodies, as you must depict its depth and the way it affects the hoodie’s draping.
Each component requires careful observation to capture the unique aspects of the hoodie’s design. As you prepare to draw, studying these parts will allow you to portray a hoodie accurately. By mastering the basics of hoodie structure, your drawings will start to take on a life of their own, allowing you to move onto more advanced techniques with confidence.
Essential Materials for Drawing Hoodies
To create stunning hoodie illustrations, having the right materials is as essential as understanding hoodie structure. Here is a list of materials that will help you in drawing hoodies with precision and ease:
- Pencils: A range of pencils from hard (H grades) to soft (B grades) will give you control over light and dark lines.
- Erasers: Kneaded and plastic erasers are great for correcting mistakes and lightening lines without damaging the paper.
- Sketch Paper: Use quality sketch paper that can handle erasing and sketching without tearing.
- Inking Pens: For defining outlines, a set of fine-liner pens or a brush pen can provide a clean, sharp finish.
- Markers: A set of markers or colored pencils can add depth through shading and color variation.
- Ruler: A ruler is useful for straight lines and keeping proportions consistent.
- Reference Images: Having photos or actual hoodies on hand will guide your drawing with realistic details.
With these tools, you can approach drawing hoodies with confidence. Remember, the quality of your materials can greatly influence the final outcome of your artwork.
Step-by-Step Guide to Drawing a Hoodie
To excel in drawing hoodies, follow this simple step-by-step guide. This guide will help you create a realistic and detailed hoodie drawing.
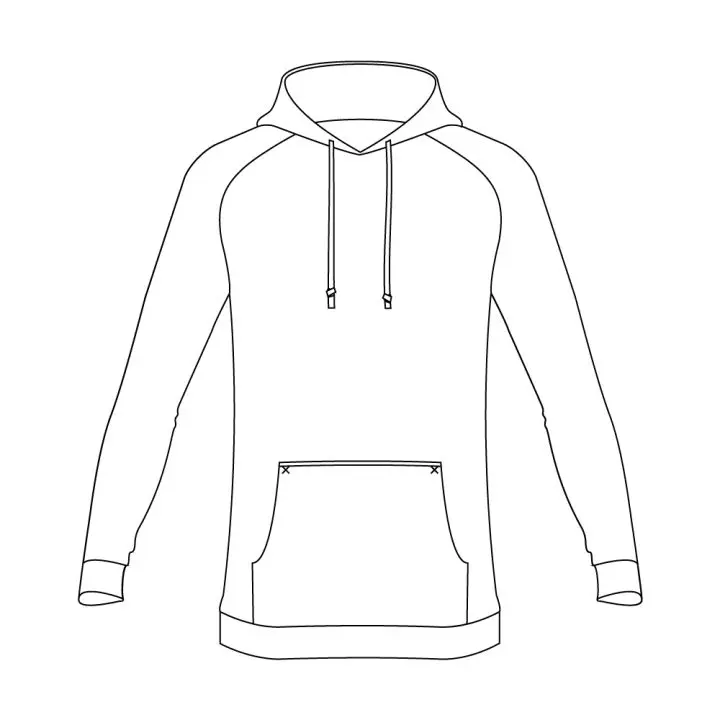
- Start with a Rough Sketch: Begin by outlining the basic shape of the hoodie. Use light pencil strokes. Connect the hood to a rounded body shape.
- Refine the Hood Outline: Define the hood’s edge and shape as it wraps around the face or falls at the back.
- Draw the Body: Sketch the body of the hoodie. Remember, it is usually loose and draping.
- Add the Sleeves: Insert long sleeves into your sketch. Make sure they’re the correct length and width.
- Sketch the Cuffs and Hem: Illustrate elastic cuffs and hem. These add realism to your drawing.
- Detail the Pocket: Carefully draw the front pouch pocket. Show its depth and impact on the fabric’s drape.
- Erase and Redraw: Use your erasers to adjust lines and correct errors. This is crucial for a clean drawing.
- Ink the Outline: Trace over your pencil lines with inking pens. This will make your drawing stand out.
- Shade and Add Color: Use markers or colored pencils to shade and color your hoodie. Pay attention to light sources.
- Final Touches: Adjust any final details. Add texture to your drawing for a lifelike appearance.
By following these steps, your hoodie illustrations will show great detail and depth. Always keep reference images close for accuracy. The key is to be patient and to practice repeatedly to master drawing hoodies with skill.
Tips for Capturing Hoodie Details
When drawing hoodies, capturing the finer details can make your artwork stand out. Here are some tips:
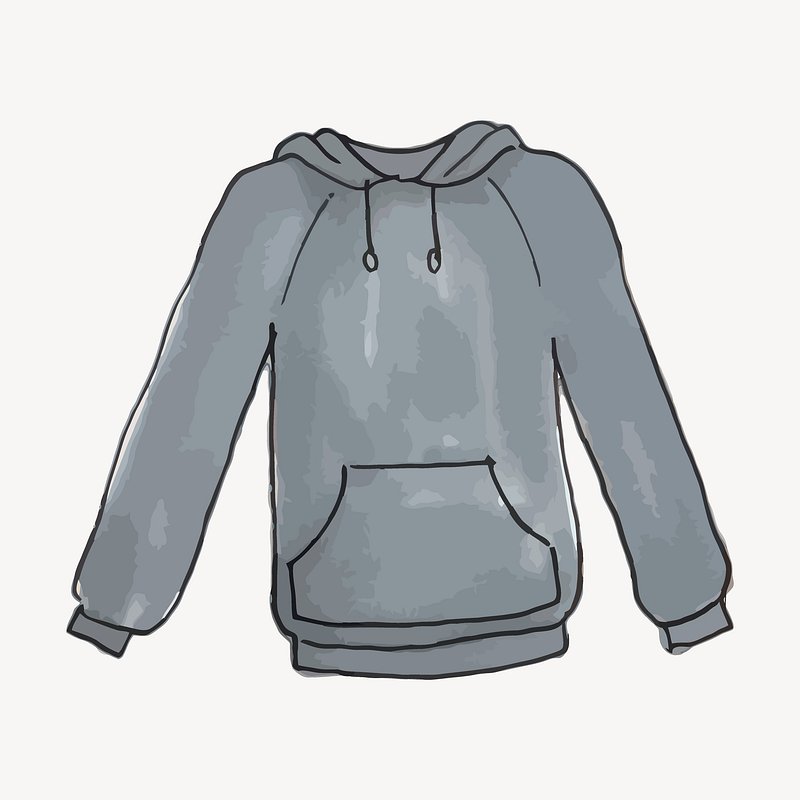
- Focus on the Texture: Hoodie fabric has a unique texture. Sketch lightly to begin, then add texture such as fleece or knit patterns.
- Observe the Wrinkles: Wrinkles form where the body bends. Notice these and capture them in your drawing to add realism.
- Study the Lining: Some hoodies have a lining inside the hood. Show this by using lighter shades to indicate a different material.
- Draw the Strings: Don’t forget the strings or cords. They often have metal or plastic tips to draw, too.
- Represent the Zipper: If your hoodie has a zipper, pay attention to its teeth and slider for accuracy.
- Mind the Seams: Hoodies have seams that can be seen. Indicate these with thin lines where different fabric parts join.
Using these tips will help you draw hoodies with more precision. Practice looking for these details and include them in your sketches. Remember that the more you observe, the better you’ll capture the true essence of a hoodie in your drawings. Keep practicing and soon you’ll notice an improvement in your hoodie illustrations.
Understanding Hoodie Folds and Shadows
Mastering the art of drawing hoodies involves understanding how to properly depict folds and shadows. These elements are crucial for giving your hoodie illustrations dimension and a sense of realism. Here are some things to keep in mind when adding these details:
- Examine Folds: Observe how fabric folds naturally. Folds on a hoodie will occur at joints and where the fabric is loose.
- Light Source: Determine where the light in your drawing comes from. Shadows will fall on the opposite side of the folds.
- Add Depth: Use varying shades of darkness to suggest depth within the folds. Darker shades suggest deeper folds.
- Shadow Shapes: Remember that shadows are not just dark spots; they have shape and form too. Shape your shadows to follow the form of the hoodie.
- Blend Shadows: Blend your shadows smoothly to avoid harsh transitions. Soft shading helps create a more realistic look.
By carefully observing and practicing these elements of folds and shadows, your drawings of hoodies will appear more lifelike and convincing. Always remember to refer to your reference images to see how light and shadow play out in real-life scenarios. Keep practicing these techniques, and your ability to capture the intricacies of hoodie folds and shadows will improve over time.
Adding Personality to Your Hoodie Drawings
Adding personality to your hoodie drawings can transform a good sketch into a great one. Here’s how to give your hoodies character:
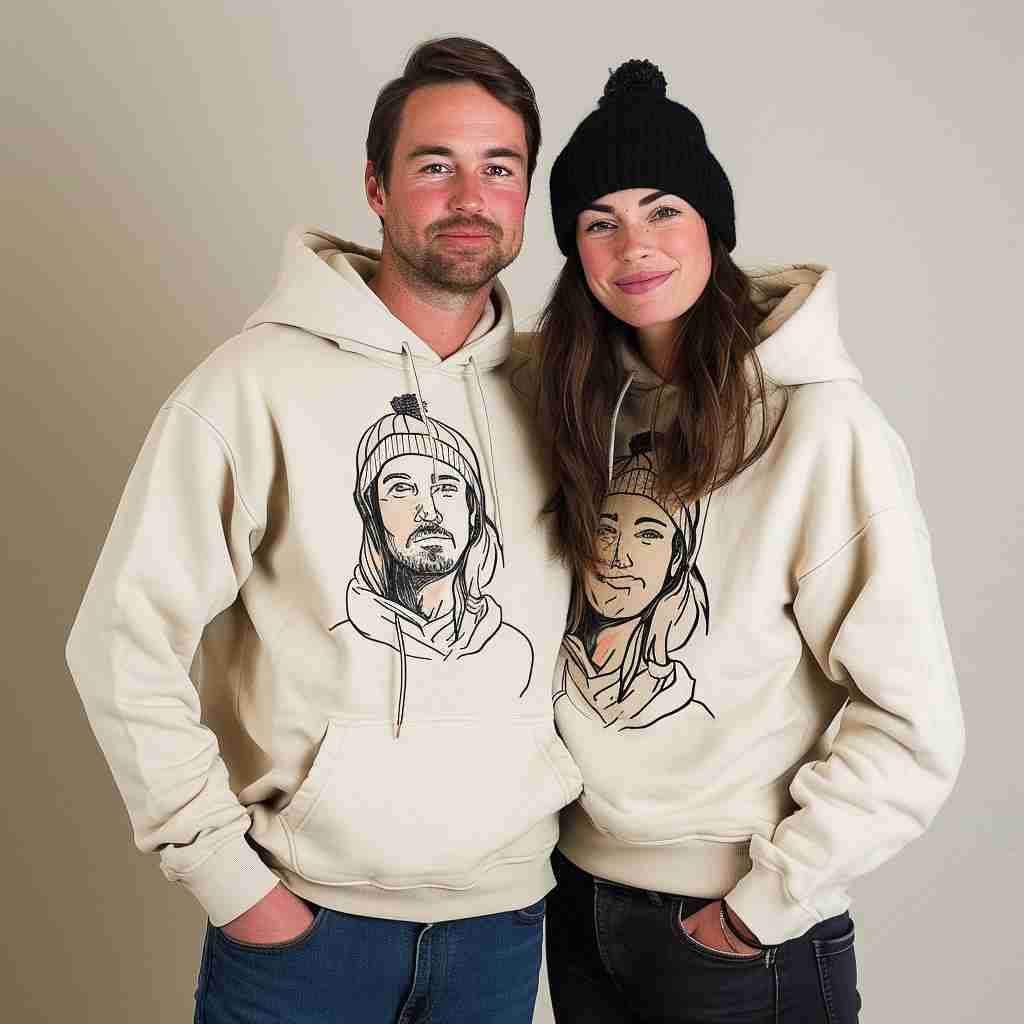
- Choose Unique Colors: Pick colors that stand out or reflect a mood. This personalizes your drawing.
- Include Patterns or Logos: Adding graphic elements like stripes or brand logos can give a hoodie its own style.
- Consider Hoodie Type: Whether it’s a zip-up or pullover, each type has distinct features to highlight.
- Play with Pose: How the person wears the hoodie affects its look. A hood pulled up can suggest mystery.
- Use Accessories: Draw items like headphones around the neck or hands in pockets for a casual feel.
- Draw Expressive Faces: If you include a face, express emotions that match the hoodie’s vibe.
- Create a Backstory: Imagine a story for the wearer. This can guide your drawing’s overall theme.
Each of these touches can add layers of depth to your hoodie drawings. The key is to experiment and find what best conveys the personality you aim to depict. Remember, practicing these techniques will help refine your skill in breathing life into your hoodie sketches.
Common Mistakes to Avoid When Drawing Hoodies
When striving to master the art of drawing hoodies, being aware of common pitfalls is crucial. Here are some frequent mistakes to avoid:
- Ignoring Proportions: One of the most common errors is getting the hoodie’s proportions wrong. Ensure that the hood, body, and sleeves align correctly with the size of the person wearing it.
- Overlooking the Weight of the Fabric: Hoodies are made of thick material. Not showing this weight in your drawing can make the hoodie appear flat. Use shading and folds to depict the fabric’s heaviness.
- Forgetting the Drape: How the hoodie falls on the body is key to realism. Don’t neglect the natural drape; show how the fabric hangs off the shoulders and folds around the waist.
- Rigid Lines for Folds: Lines that are too straight or uniform for folds can make the hoodie look unnatural. Use varied and curved lines to mimic the way fabric crinkles and folds.
- Flat Pockets: A flat-looking pocket can ruin the depth of your drawing. Remember to show the pocket’s thickness and how it can alter the shape of the hoodie.
- Misplacing Shadows: Incorrect shadow placement can disrupt the three-dimensional look. Be sure to set your light source and cast shadows accordingly.
- Over-complicating Textures: Adding too much texture can overwhelm the drawing. Keep it simple and focus on key areas to suggest the fabric’s feel.
By keeping an eye out for these common mistakes and practicing consistently, your hoodie drawings will significantly improve in quality and realism. Refer back to the essential materials and step-by-step guide as needed to help you along the way.
Exploring Different Hoodie Styles and How to Draw Them
When it comes to drawing hoodies, variety is key. Different styles can add interest to your illustrations. Here are popular hoodie styles and tips on how to sketch them:
- Pullover Hoodies: These are classic and simple. Start with a basic shape and add a large front pocket. Remember, the hood connects directly to the neckline.
- Zip-Up Hoodies: These have a more structured look. Draw a zipper line down the center. Include collar details and adjust the pocket shapes to fit on either side of the zipper.
- Oversized Hoodies: They offer a baggy look. Use exaggerated lines to show volume. Add more folds to reflect the loose fit.
- Fitted Hoodies: Contrastingly, these are snug. Draw tighter outlines. Show the fabric stretching slightly over the body.
- Sleeveless Hoodies: Often seen in athletic wear. Omit sleeves and sketch deeper armholes. Add a waistband to show the hoodie is hip-length.
- Patterned Hoodies: Patterns can be tricky. Start with flat colors. Then add the pattern, keeping perspective in mind.
- Hoodies with Logos: Place the logo where it’s visible. Sketch it lightly first. Then define it after positioning it correctly.
- Hoodies with Accessories: Sometimes, a hoodie comes with extras. Items like earphones or hats can add character. Show how these affect the hoodie’s shape and folds.
- Graphic Hoodies: These feature designs or prints. Sketch the design as a separate layer on the hoodie. Make sure it follows the fabric contours.
Remember to consider the unique features of each style. Use reference images to guide your work. As always, practice is essential. Drawing different hoodie styles will broaden your skills and portfolio. Keep experimenting with each style until you feel confident in your ability to capture its essence.